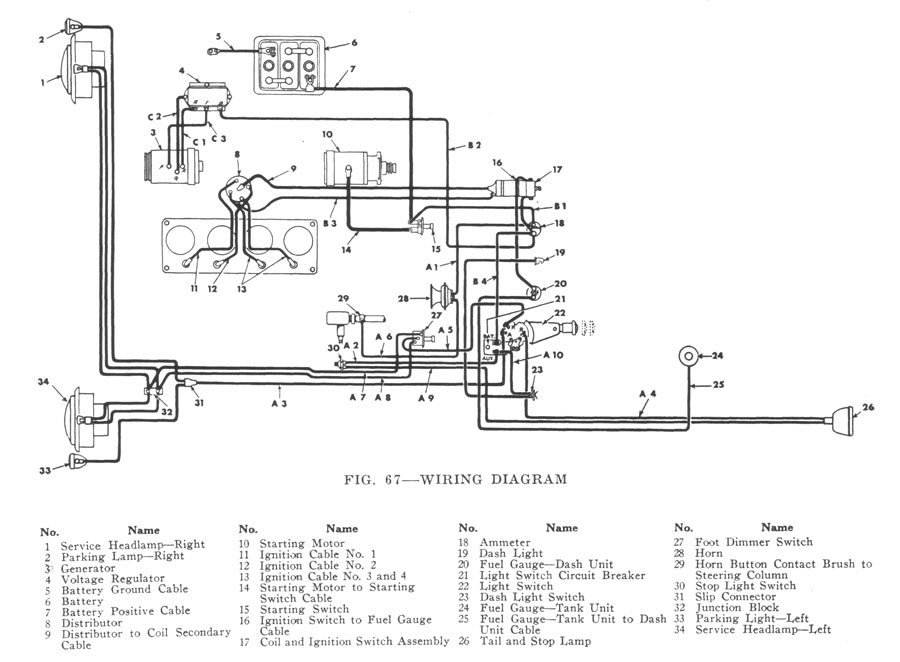
The CJ2As wiring is about as simple as it gets, but the wiring diagrams in the Willys manuals are a compromise, and can be confusing. Aside from being a schematic, they are also a layout, with the parts being shown in the same relative locations they would be on the vehicle. This makes it difficult to decipher, since wires are shown crossing over each other all over the place.
The example below is from the 1945 CJ2A Maintenance Manual. Later year diagrams are slightly different, but only in form, not function. Some of the parts have changed shape and location, but the wiring is essentially the same.
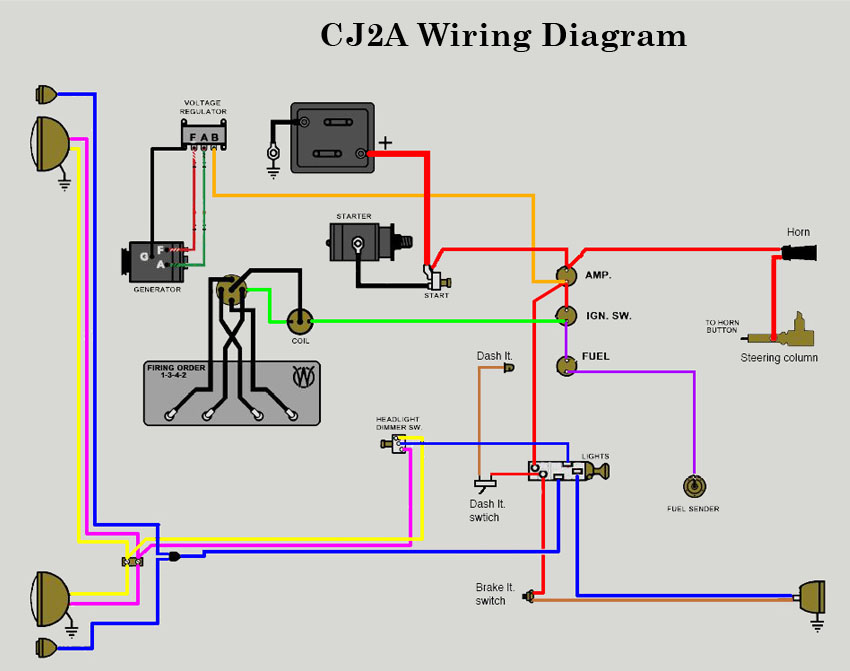
The same diagram, colorized, and with some part locations rearranged for better clarity. It shows a typical modern coil & ignition switch, not the original integrated coil/switch as in the Willys diagram. Since most of these coils burned out long ago, and replacements haven't been made for near 50 years, most CJs have the newer coil setup.
A comparison of the original and modern coil/switch setups is at the bottom of the page.
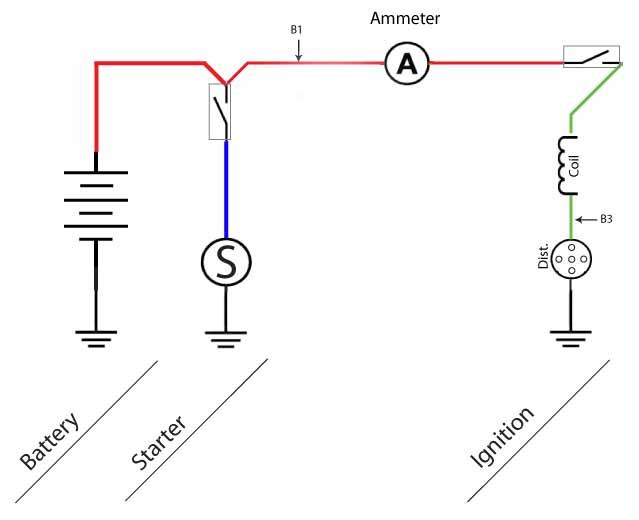
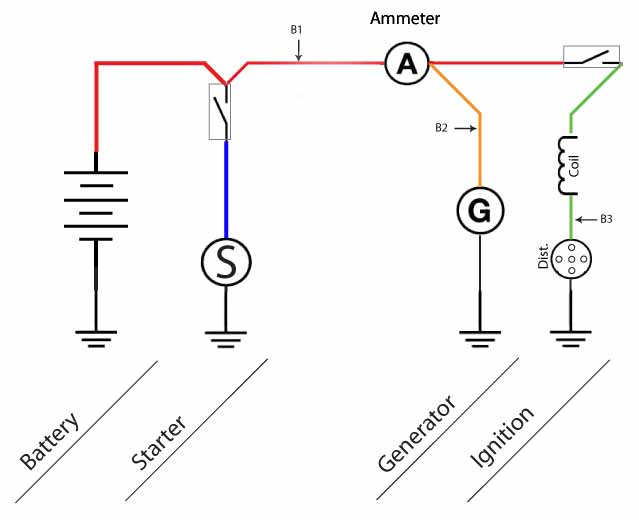
Laid out linearly, from the battery to the farthest connection. Colors are my own chosing, just for clarity. The original Willys wire color markings are noted in the diagram. Not all wires are identified in the Willys diagrams.
Note that the ignition switch only controls power to two circuits: the coil, and the fuel gauge. You can crank the starter, honk the horn, and turn on all the lights WITHOUT the key!

The original charging system has often been replaced, usually with a 12v alternator. Voltage is irrelevant here, both are configured in one of these 3 possibilities:

Ammeter and coil switch are not absolutely necessary, but helpful and convenient.
|
|
| Start & run from battery only. | Start, run & recharge battery. |
|
|
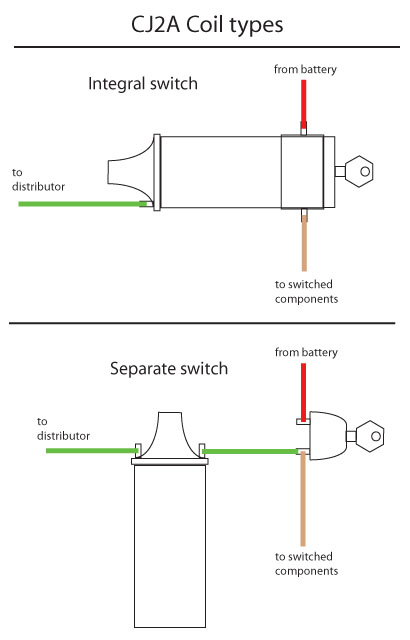
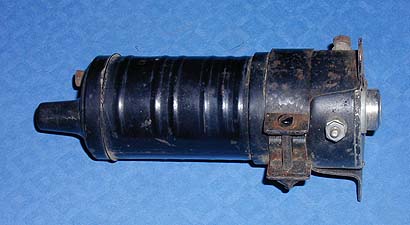
The original coil had the ignition switch built into the coil base. This style fell out of use by the early '50s, and replacement coils haven't been made since then.
The typical modern coil & separate switch just requires one additional wire.
 |
|
 |
|
 |